Mini Halloween Treat boxes with Scor-Pal

Hello friend and happy October!! We are starting off the big holiday season of the year – it begins with all things fall, going into Halloween, Thanksgiving and the big one…Christmas!

Here in Florida the weather is still warm, but I have my fall decor out already. Our neighborhood does Halloween big time. We get over 200 kids trick or treating. One house has a Bounce House in the front yard, one house has fresh chocolate dipped marshmallows, and one has jello shots for the parents!! Many of our neighbors go all out on the Halloween decorations as well. We’ve never had any problems over the years.


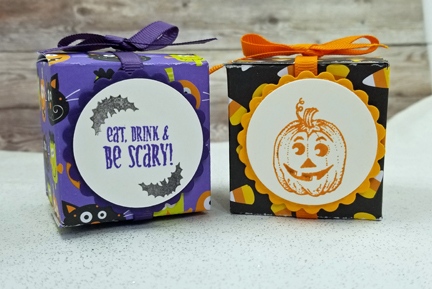
So, today I am sharing with you a couple of cute mini treat boxes made with my Scor-Pal and Score-Tape.

Start by taking a piece of patterned paper sized 8.5 x 5.5 and score on the long side at 2:, 4: 6″ and 8″.

On the short side, score at 2″ and 4″.

Fold and burnish the score lines and cut the tabs as shown in the photo below.

Using Scor-Tape, assemble the box.

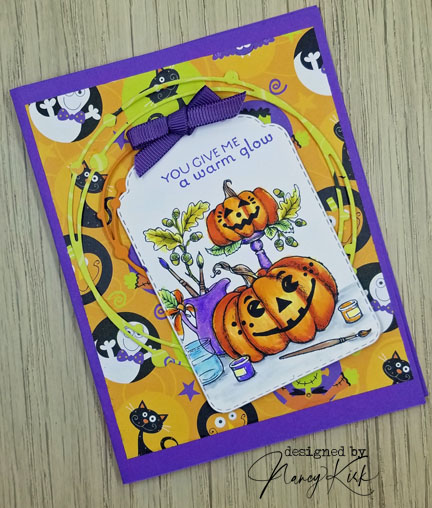
To complete the little boxes I used some circle die cuts and old stamps from Power Poppy.

Thanks for stopping by today!!

Nordic inspired Card

Here I am once again showing one of the Christmas cards I made this year.

I started out with the embossing folder from Spellbinders called Ski Lodge. It has that great nordic pattern to it. This folder is a large one – 8.5 x 5.5 – so I was able to emboss a half sheet of card stock then cut it in two for use in two cards.

I wanted to keep it simple, so I used a sentiment from and old Power Poppy set and added a strip of red cardstock across the lower half. This is another card that can be made quickly and in multiples.

Thanks so much for stopping by today.

Halloween Treat box

Happy October crafters!! Is it Fall yet? Last week here in Florida we had temperatures in the 90’s, so an “iced” pumpkin spiced latte was more in line!

I have today a cute halloween treat box made with my Scor-Pal and Scor-tape.

It uses transparency film – sometimes known as window film, some halloween paper, stamps, ribbon and dies.

I started by taking a piece of clear film measuring 4 x 10 and scoring it on the long side at 2 3/8, 4 3/4, 7 1/4 and 9 5/8.

Fold and burnish on the score lines – this film was very thick and I really had to burnish well to get the folds. Then place score-tape on the smallest strip and make the box. It’s hard to see in the photo below!

To make the top and bottom take a piece of 4″ x 4″ patterned paper (this paper I purchased at Hobby Lobby years ago and I only use it at halloween so I expect it to last me for years!) and score at .75″ all around. Make two of these – one for the top and one for the bottom.

Cut the ends as shown below and add score-tape.

Attach the bottom to the box with score-tape, fill with treats, then add the top and some ribbon.

The stamp is from an old set from Power Poppy.

Thanks for stopping by today!

Inktober!

So, it is October and many stampers and papercrafters and calling it Inktober – a month where we ink up our papers and be creative! Here is my first card to celebrate it!

I chose some fall colors for this card.

First I stamped the large leaf image in white pigment ink and embossed it in detail white embossing powder. The leaf image is from Power Poppy and is call Big Sexy Leaves. It is a large stamp!

I then sponged memento inks over the image using shades of yellow, orange and red.

The front of the card was made by using spellbinders circle dies. First to create an opening in the white card, then using two dies, one larger than the other, I cut them out together to create a circle frame.

The smaller leaf die cut was colored using the same inks – I believe the die is from sizzix. The sentiment is an old Papertrey stamp.

Thanks for stopping by today – I hope all is well wherever you are!!

Pumpkins

Hello crafters and welcome to fall. I have a quick card to show you using a digital image from Power Poppy called Painting Pumpkins.

I printed the image on Copic X-Press it cardstock and colored it with copics. I then cut it out with a tag die. The patterned paper is from a Halloween pack I picked up several years ago – I think at Hobby Lobby.

I also made a card using the same stamped tag with a clean and simple background:

In this card, I just adhered the tag to a white base cad. I don’t know if you can tell but on the base I used a scor-pal and made a series of vertical scores on the front, just to give it a little texture.

Thanks for stopping by today!

Fresh Strawberries

/

I’ve used 2 different stamp sets to make this cute card. Both sets are oldies but goodies and no longer available. The Seed Packet image is called Seeds of Friendship and the Strawberry stamp are both from Flourishes.

I colored the image with copic markers and added it to a base card embossed with a swiss dot embossing folder.

A button and gingham ribbon finish it off.

Thanks for stopping by!

Sunflower

Hello stampers – I hope the summer is going well wherever you are.

Today I have a clean and simple card to show you.

The sunflower image is from Power Poppy and was colored with copics.  The sentiment is from Papertrey.

I used a stitched die to create the frame, and choose cardstock in brown and orange/yellow tones to coordinate with the colors of the flower.

Just a simple sheer polka dot ribbon was used to embellish the card.  I love the clean and simple look!

Thanks for stopping by today!

St. Patrick’s Day!

Hello stampers and Happy St. Patrick’s Day to you!  Here is my card to celebrate the day.

I only have one St. Patrick’s Day stamp set so I bring it out each year.  These stamps are from Power Poppy.

I colored the clover bunch with copic markers.  I did a video tutorial on the coloring and that video is linked below.

Once the coloring was done I used Spellbinders dies to cut out the front of the card to create the frame.  The front was also embossed using a cuttlebug embossing folder.  Small pearls were used around the frame – they were white but I colored them to match using a copic marker.

Thanks for stopping by – here is the video link for the coloring tutorial.


Open Hillside Christmas card

Hello stampers!  I have another Christmas card to share with you today.

This pretty aqua and white Christmas card uses a few dies and stamps to create a wintery scene.

I started by using two Poppy Stamps dies – Open Hillside and Sloping Hillside. I cut each die then layered them putting the Open Hillside die in front.  The trick to pair these two dies is to leave enough of a border around the die cut so you can line them up.

After gluing them together I added some glitter on the trees and snowbanks.

I then took a scrap of the aqua paper and stamped and embossed some snowflakes to create the background.  All the pieces were put together and added to the card front.

The poinsettia die is from Spellbinders and I added a small aqua pearl to the center of it.

While this has a clean and simple look, it was a bit more involved.  With the die cuts you can be efficient.  I have the regular sized Gemini die cut machine and can run both hillside dies and the poinsettia die in one pass instead of cranking three dies separately.

I hope your holiday season is going well.  Thanks so much for stopping by!

Scor-Pal More Than One Score Challenge – Masculine/Father’s Day

Hello crafters – happy June!!  I hope this summer is going well for all of you.  It certainly is  little different these days, but we are all hanging in there!

It’s the start of the month, which means a new Scor-Pal challenge with a Masculine/Father’s Day theme

Each month we will have a different theme and you will have a month to create and enter your projects. As well as the theme you will need to make “More Than One Score” and tell us where you used the Scor-Pal on your project. So a single fold card won’t count but an Easel, Gatefold, Stair Step, etc will 🙂 Also we love to see your “Anything But a Card” projects, just as long as you make “More Than One Score”
We have a ton of inspiration on our Projects on the Scor-Pal website and also on our Pinterest Board to get you eager to enter.

I created a Pop Up gift card holder with a masculine flair.   I used a Scor-Pal, Scor-Tape and some old stamps from Power Poppy. The image was colored with copics. The Scor-Pal can be found here and Scor-Tape can be found here.


Here is the inside of the card – when you open it up the gift card flips up.

I started with a piece of cardstock measuring 4.25 x 11 and scored it at  4.5, 5.5 and 6.5.

Then fold on the scor lines so you get a valley/mountain/valley fold.

Flip it over and place a narrow strip of scor-tape along the bottom.

Using the edge of a die cut, or a punch,  cut the flap for the gift card as shown.

Here is what it will look like once the cut is made – you can just slip the gift card in the slot.


Thanks so much for stopping by today!  I hope to see your entries on the Scor-Pal blog!!